Saturday, July 30, 2011

Unique

One of the joys I find with making jewelry is trying to make something completely unique and handmade. Of course I make jewelry with components I buy, but I enjoy making as much of my jewelry myself as is possible. I like how that idea pushes me to learn new techniques and keeps things exciting and new.

I was recently asked to design a necklace for my nephew who had earned his Eagle Award in the Boy Scouts. Being a guy's necklace, I wanted it to be simple... just an eagle on a leather cord. Sometimes I use rubber stamps to impress a design into Precious Metal Clay. It's a simple way to add texture or a picture to a piece of jewelry. So I started looking for a small rubber stamp that had a simple and masculine image of an eagle on it. I didn't have any luck. Most of the stamps I found were too large for a necklace... at least for the simple necklace I had in mind. The only one I found that was small enough was rather cartoony, more something for a child.

So... I decided to make my own! I didn't actually make the rubber stamp (which some people carve by hand, I found! Like Corrabelle in her Etsy shop The Mayberry Sparrow) but I drew an eagle that was exactly what I had in mind, and had it made into a rubber stamp. I was really pleased with the way it turned out, and with the fact that it was truly unique. I think my nephew liked it too! :)

This is my drawing. It has to be fairly simple, because too much detail ends up getting lost in the clay. Especially when it's going to be a small stamp.
 I took a picture of the stamp, but it is the clear kind and didn't show up well....


...but this is the completed necklace.

I'm so excited about this new method for making jewelry that won't be found anywhere else, I can't even tell you! I've had a couple more stamps made, and this time I ordered them from an Etsy shop called Dragonfly Buzz. She makes laser cut custom stamps. I do like to buy handmade when I can!
I drew the shark for a key chain I made for my husband. He likes sharks because they don't stop swimming. They have to keep moving forward, even when they sleep, or they will drown... That's just how their gills work. That pretty much describes my husbands outlook on life!


This is inspired by my mom. Not only does she collect lighthouses, but she is a constant, guiding beam of light.
And this dove represents my best friend. Every time I go to her in a frenzy, which is often, she listens patiently and calms me with her practical wisdom. She brings me peace!

This is the clasp for a bracelet in progress. :)
Alisa

Friday, June 3, 2011

Friday Finds

With Father's Day just a few weeks away, it's time to start shopping handmade! Give those artists time to create for you, especially if you want something custom. Browse through Etsy or Artfire, or anyplace else you like to shop for handmade items, and run a search for "fathers day." You might be surprised at all the creative things you'll find that you've never even thought of. I was!

Valet / Keepsake Box, Leopardwood with Birdseye Maple
This is a beautiful box, and Knotheads Woodshed has more where this came from.

Dry Spice Rubs
For the BBQ lover in your life. These spices and a few nice ribeye steaks, and my husband would be in heaven! Check out everything Cook Outside the Box has to offer.

Sapele Case for Apple iPhone 4
This is great, huh? Yes, it is. Find more at Signimade on Etsy.

Nerd 4 Life Mug
Ha ha! Your dad's probably not a nerd, even if he IS a genius, but this made me laugh! My husband is an engineer, so... yeah. ;)

My contribution to a happy Father's Day is a discount for you! Use coupon code DADDAY11, from now through Father's Day (June 19), when you order either of these customizable gifts:

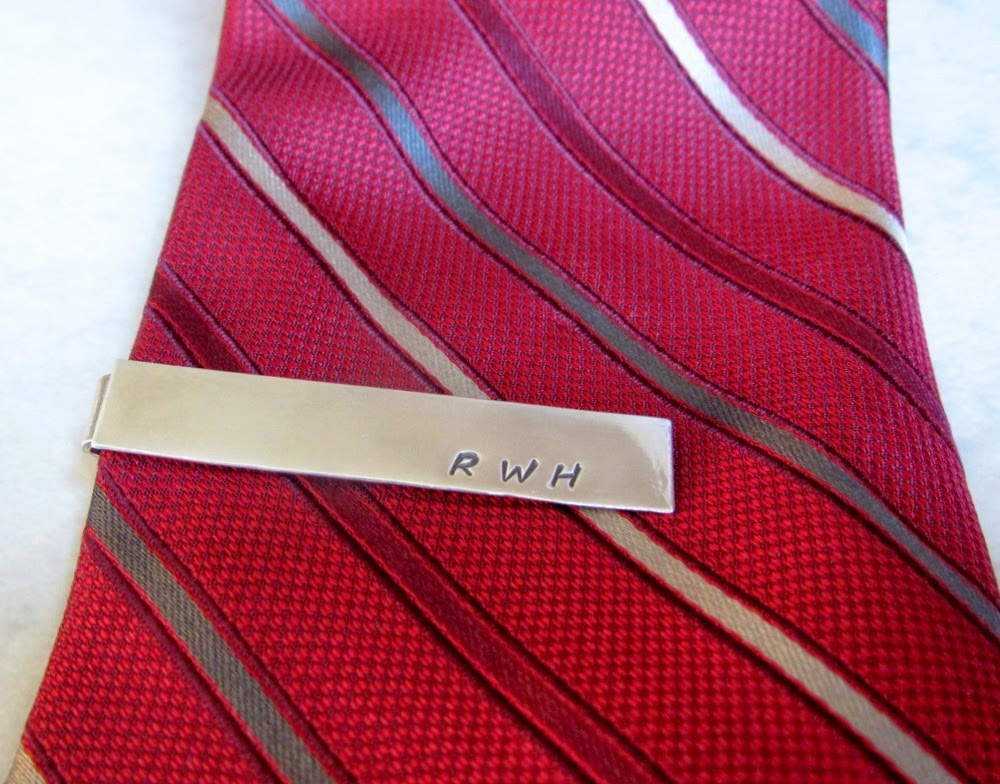
Hand Stamped Sterling Silver Tie Bar

Mixed Metal Necklace
Alisa

Wednesday, June 1, 2011

Water Casting... Thoughts?

A few months ago I took a water casting class at The Sawdust Art Festival in Laguna Beach, CA. Fun? Yes!

Water casting is pouring molten metal into a pot of water, where it almost immediately solidifies in random shapes. As students, we each got to melt a mixture of sterling silver and a bit of copper in a crucible with an acetylene torch, which we then poured into the pot of water. It was fun (and a little scary!) to use the torch in one hand (a much larger and hotter torch than I usually use), and swish molten silver around in dish in the other. I kept visualizing myself splashing some out on my foot or someones pant leg. Exciting! :) We could either pour the silver directly into the pot of water, or pour it into a bundle of straw which had soaked in the water and was standing up in the pot. I wish I had pictures to show you of the straw method, but I didn't go that route, so no pics. They came out in sort of a long shape with vertical grooves in them. They almost looked like some kind of crystallized mineral or something. They were pretty cool, but I watched several unsuccessful attempts, and decided to just use the pot of water.... It was a larger target to aim at! I had time to do it twice, and ended up with two very different pieces.


This was the first one I made. The metal hits the water and cools immediately in whatever shape it splashes into. Each piece also comes out with an interesting patina. The colors in the patina depend on several factors like the temperature and length of time the metal was heated, the combination of metals used, and the speed of cooling. We didn't get into trying to acheive a particular patina... we were just newbies, but I kind of like the golds and greens and pinks in this one.


And this is my second piece. I like the more compact shape of this one. I played around with the patina a little after I got home because I wanted to accentuate the high spots by darkening the nooks and crannies. I like the effect, and I also like how, over time, the high spots have darkened to a goldish color because of the copper mixed in with the silver. However, the original patina had some of the same greens and pinks that the first one has... maybe I should have just left it alone. Trial and error. Live and learn.

Ever since I took this class I have wondered about making some pieces like this to sell. They are very different from my usual style. I normally like to plan something out ahead of time, and then make my jewelry according to plan. These water cast pieces are completely random. I suppose with practice I could control the outcome a bit, but not much. You get what you get. Maybe that's good?

What do you think?

Alisa

Thursday, May 26, 2011

Friday Finds

It' Memorial Day weekend for those of us in the USA! I hope you've made some fun plans... Hanging out with your family and friends, maybe a barbeque or a picnic, or even camping! Sounds fun to me, I love that stuff. :)

But let's also take a little time to think about this great country, and the freedoms we enjoy.... And remember how we got it. Remember all the brave men and women who gave their lives to protect ours, and all those who are protecting us now. And maybe say a little prayer of thanks.

Now I hope you'll enjoy some hand made patriotism, and have a great weekend!

Land of the Free American Flag 8 x 10 Canvas Wall Hanging by Mark My Words Studio

Misty Battlefield 8 x 10 print by Wild Wilderness Photos

My Husband My Hero by The Beaded Butterfly

Custom Dyed and Screen Printed Navy Wife T-Shirt by Piki Niki Designs

Arlington Cemetery 20 x 16 Original Oil Painting by Art de Joie

American Flag Baby Tutu by Teddy's Tiny Tutus
Alisa

Tuesday, May 24, 2011

Can You Picture This? (Part Two)

I have been working on some of the things I wrote about last week... remember, this is not "instructional" as much as it is "exploratory!" I am on a quest to improve the quality of my pictures, so I have been researching, practicing, and reporting here. I am not a professional. That is my disclaimer.

The first thing I did was to borrow my son's light tent. It really is great, I don't know why I don't always borrow it... except that maybe I am too impatient to set up a good shot, or it could be that I feel bad borrowing the stuff that he paid for instead of getting my own... Either way somethings gotta change! I did decide that if I buy my own, I would like a smaller one than he has. His is about 2' across by 2 1/2' tall, which worked well, but the jewelry seemed so small inside that I felt like some of the light kind of got "lost" in that big area. I wanted it to be more condensed. Smaller would be a little less awkward to work with too. But, all in all, the tent made a great improvement.

I also played around with backgrounds. You may remember that in the DIY light box tutorial it suggested getting two pieces of poster board; one white and one black. I tried that, and I, personally, don't care for the black. There is probably a method for using it that I'm not aware of. If someone knows it, I would love to hear about it, because it came in a package of 5 sheets. :)

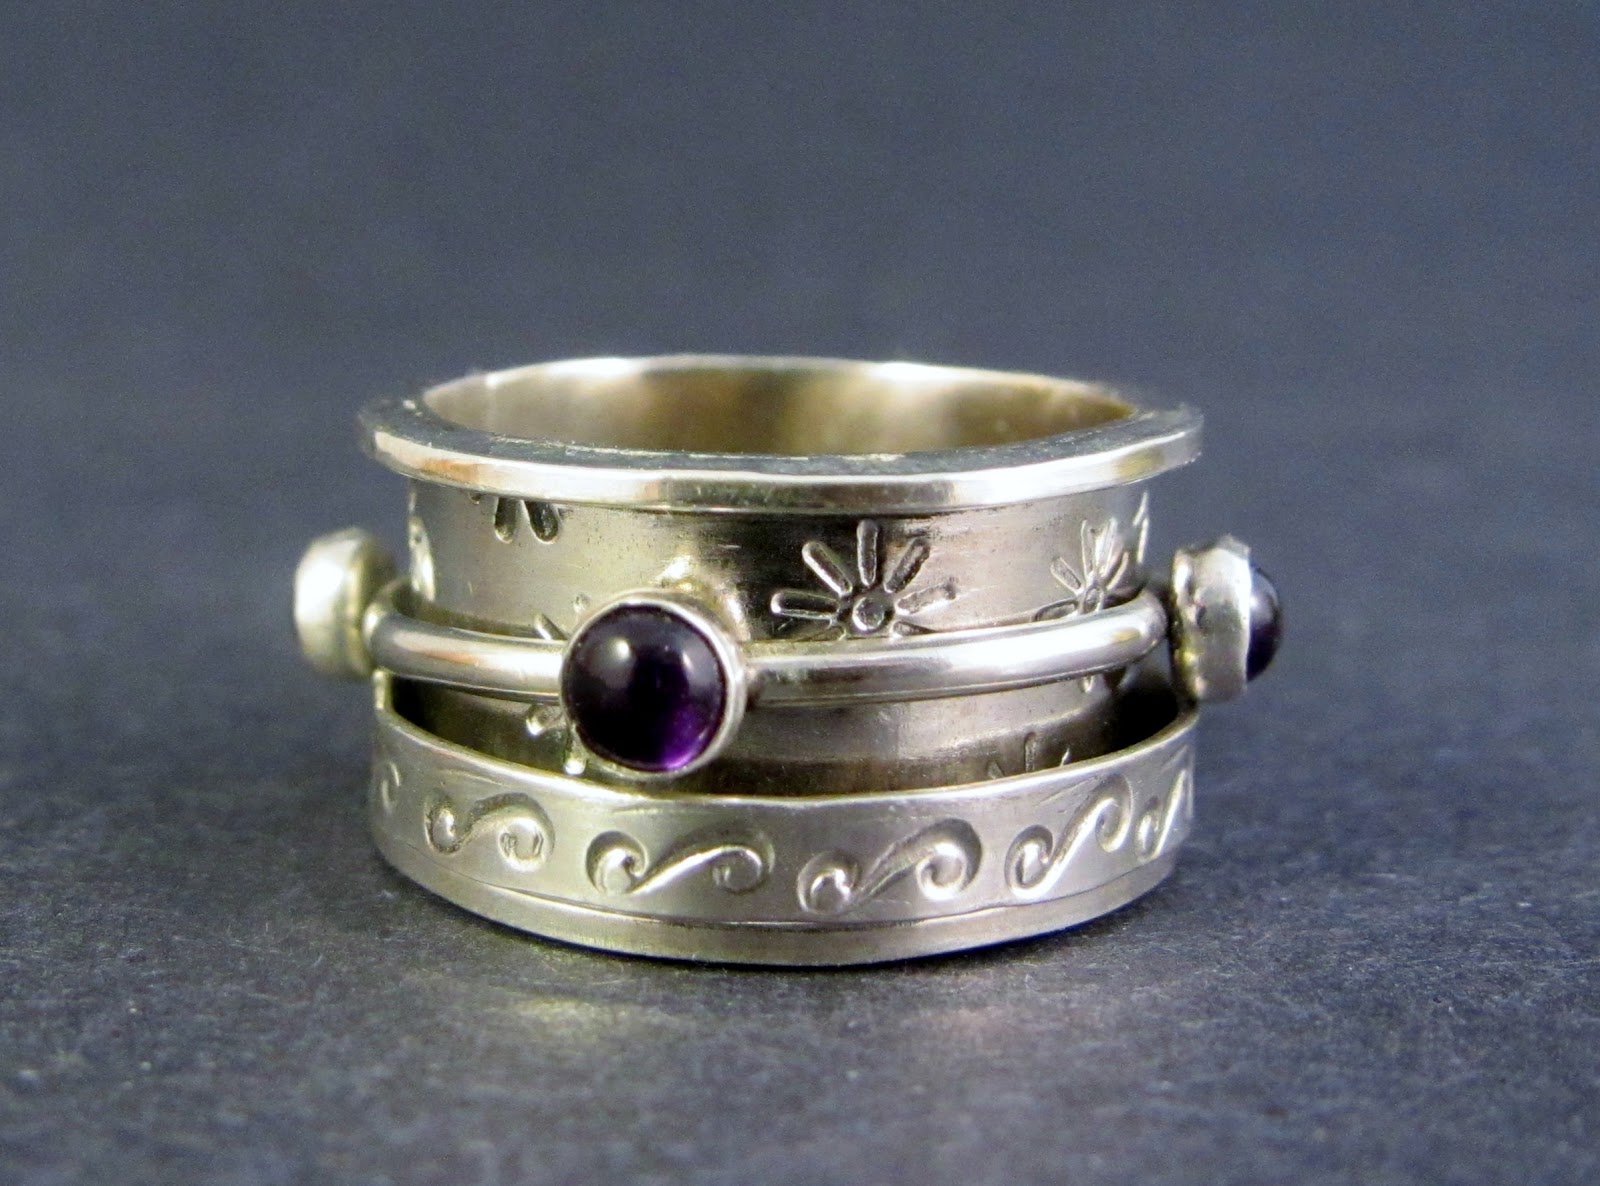
 Amethyst Spinner Ring

See? It just doesn't do anything for me. Again, The Tabletop Studio has a solution, this black acrylic sheet and accessories, which look pretty, but has a pretty price too. But look at this! Here's a 12" x 24" piece of black acrylic for under $8. Of course that's minus the lights and other accessories, and you'd want to read up on how to set up the shot, but it's definitely a more affordable route.

Back to poster board.... I did like the white.


The white background is nice and clean. I tried to adjust my lights to minimize the shadows, and while I wasn't able to completely eliminate them, I still think they turned out quite well. You'll notice the bottom left picture has a different hue. That piece is made of bronze, and I tweeked it a little in Windows Live Photo Gallery to make the bronze color a little more accurate. I don't do much tweeking, frankly because I don't know how. But I also wonder why you would want to make the picture you're posting look any different from the piece you'll be mailing out? I almost always click on "auto adjust" though. It usually makes to colors look more accurate than the original picture does.

Although I like the white, I experimented some more by printing out some gradient backgrounds. I just googled "gradient backgrounds" and clicked on "images" and there were a ton of them. I found a few I liked and printed them out on photo paper (be sure to find non-copywrited backgrounds). I tend to like the more subtle backgrounds, but that's just me. Find what works best for you.


This blue was a bit bright for me. I chose it because I thought it might help bring out the purple color in the amethysts on the top ring. It didn't. I had trouble with those amethysts! I do kind of like the reflection in the picture of the ring on the bottom.


The above pictures were taken with a background that was very light blue (almost white) in the center and became more of a sky blue as it radiated out. Because the jewelry is so small it was hard to position it in a place where the camera would catch the gradient color. In other words, in the background immediately surrounding a small piece of jewelry there was not a lot of graduation of color - it almost looked all the same color. The necklace shot was easy because it covered more of the background. I took several that way, and they all turned out nice. You might notice I have the amethyst ring propped up, hoping to catch the color. It's a bit better, but I don't like that particular prop.


In this picture is a black gradient background I tried. I don't recommend it. I still don't think the black is black enough. It was also hard to use because it was so easily scratched. By the time I was done there were little scratches all over it, and I was being careful! Printer ink is too expensive to print out backgrounds that can't be used more than once. But, again, I do like the reflection.

These are my favorite! It's a gray gradient background, less subtle than the blue. Just enough! I tried to get tricky in the bottom picture. I was getting really frustrated with trying to catch those purple amethysts! I read about the sparkler light on The Tabletop Studio website. Its a third light that can be used, which should be positioned at about the same angle as the camera. It's designed to catch the color and sparkle of gemstones. I used my son's desk lamp. :) I held my camera just at the top of the lamp, I wanted the light and the camera to be as close together as they could be so that the shadow cast behind the ring would be hidden from the camera's view. It resulted in the shading at the bottom of the picture, which was unplanned, but which I really like. Sometimes good things just happen. I stood the ring on it's side, not so much because I like that position, but because it raised up the amethyst to a spot where it could really shine.

Two more things that I definitely think are worth mentioning are to always use a tripod (and maybe your camera's timer or remote if you have one) so there's no wiggle, and to have your camera set on the highest quality pictures. Especially if you aren't using a camera with a macro setting, because you're probably going to have to crop them. That can accentuate any blurriness, and make them a little pixely if they are on a lower quality setting. If you have trouble uploading them onto a site because the file is too big, you can always resize them. But I like to keep the original in case I ever want to print them for a catalog or something.

Ok, I think I've told you everything I know! Hopefully I have not confused you or led you astray. Remember, I am on a journey of learning. Any tips, comments, or corrections are welcome, and in fact, hoped for!

After last weeks post, Cheryl @ Sew Can Do made a comment about a light scoop. I didn't know what that was, but she loves hers! I found it here. It looks like a great invention to me, and I'd love to give it a try, but I don't have the right kind of camera. I've been trying to think up a way to rig something up for me to use.... haven't finalized that thought yet.

I also want to thank UKZoe for mentioning looking on ebay for less expensive light tents. As I mentioned last week, less expensive makes me happy! :)

Alisa

Wednesday, May 18, 2011

Can You Picture This? (Part One)

Because pictures are so vital in selling anything online or in a catalog, I'm always trying to improve mine... or I'm always thinking in the back of my mind that I need to improve mine. :) Some days I will take some pictures and they turn out great, but then on another day I can't get a single good one. The frustration has pushed me over the edge!

I decided to learn more about taking professional looking pictures, specifically close up, or macro, shots. At first I was a little daunted, as I don't know much about aperture, composition, white balance or any number of other photography terms. I have a point and shoot digital camera, and am not interested in spending obscene amounts of money on a fancy camera and equipment. I was happy to find that there are some very effective techniques that are also inexpensive. Inexpensive makes me happy. And so does effective.

Ok, so you need a camera. Most, but not all, point and shoots have a macro setting, which allows you to take very close up pictures. If you are in the market for a new camera, definitely find one with a macro setting! If you already have a camera, and it doesn't have macro, don't despair. You've just got to be sure to use a tripod to get nice, clear pictures that will still look good after you crop them... More of that next week... Other than that, if you know few helpful hints, the auto setting works great!

This is my camera, a Canon Elph, and I love it.

Lighting is a biggie. Natural light is the easiest, and it's free! I've got a window in my house that I like to take pictures by, especially in the morning. It faces kind of southwest, so mornings are good for the light because at that time of day there is no direct sunlight coming in. Going right outside also works great, either in the shade or on an overcast day. You want to avoid both direct sunlight and a flash; the goal is bright diffused lighting.

There are other ways to get good lighting, of which I am not an expert. You can use a light tent and some lights, which gives you a lot of control of the brightness and direction of the light, and also allows you to get that smooth seamless background that looks so classy. The Table Top Studio Store has all the fancy-schmancy photo equipment you could ever want, and it also has some very helpful (and free!) tips and instructions for taking great pictures. You could learn more about professional photography there than what I can tell you. But, they won't tell you this: How to make your own light tent for $10 or less. But This Guy can! He's got some very simple instructions for a DIY light tent that will cost you $10 only if you're a big spender, but probably less than $5.

Commercial light tent
My son has one of these commercial light tents and it's great. You could find one for under $50 (without the lights), and you'd have a nice, durable and portable tent that will last you a long time, no hassle.

The Stobist DIY macro photo studio

Or, if you're a do-it-yourselfer, this one works just as well, plus it has the added feature of the side flaps for more light control. A bit more fragile maybe. Click on the above link for instructions. Either choice is a good investment, in my opinion.

Alright, I'm going to play around with my camera and the lighting (and hopefully you will too) and be back next week with some pictures, and more tips I've found helpful! If you've got advice or questions I'd love to hear them!
Alisa


Friday, May 13, 2011

Friday Finds

I found some great Springtime Finds this week! I love Spring, when the days get longer and warmer, and the flowers start blooming. Ahhhh, it makes me happy!


I love this sweet, simple Pillowcase Dress that I found in a shop called The Uptown Baby! She's got them in lots of colors, along with other adorable baby fashions.

And this Chippy Blue Mosaic Chair by Rush Creek Mosaics... Wow, I love it!


What says "fresh spring day" better than Crisp Apple Daisy Soap found at Satin and Birch?

As a child I remember watching for the tulips to start appearing as one of the first signs of spring. This Dew Tulip print from Walda Photography takes me back!

Alisa