I keep seeing these online, and I've been wanting to make one forever. I'm so excited to finally have one done! It took some thought and planning beforehand, and since I usually tend to tear into things without much thought and planning beforehand, I thought I'd better document the process in case I want to make another one.
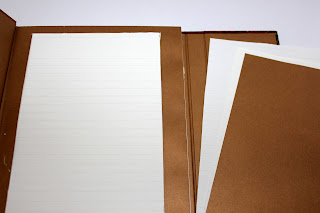
The choosing of a book actually took me a while. I started out wanting to use an old classic book... Something that would make me look cultured and intelligent if I carried it around. :) But finding one that was big enough without being too bulky was a challenge, not to mention the fact that I would probably have a hard time "destroying" a classic when it came right down to it. I finally found this blank journal, and I think it's perfect! It's nice looking, has a ribbon marker, and best of all, it has a magnetic flap closure. I found it at
The Vickerey.
Ok, let's get started! In addition to your book of choice, you'll need Elmer's Glue All (or something similar), a small bowl, a paintbrush, an exacto knife, coarse sand paper, a stapler, and clear elastic. I had a hard time finding clear elastic (in the one and only store I looked in - I hate shopping!) so I bought a pair of removable clear bra straps. Worked perfectly! You'll also need to have something heavy on hand to weigh the book down as the glue dries. And, of course a Nook or Kindle for sizing purposes.
1. If your book has a ribbon marker, cut it out, but leave the top inch or so to make it look like it's still in place as it should be. We'll get back to the ribbon later.
2. Glue together the first 1/4 or so of the pages*; just lightly to hold them together before you start hollowing out the book. It probably won't hold for the whole process, and that's ok. You'll apply more glue later. It's important to thin the glue with water so it seeps into the pages better, and isn't visible when it's dry. Put a bit of glue and water in the small bowl, and use the paintbrush to apply it to the outer edges of the pages. Be so careful not to glue the cover down! It's better to leave the first few pages unglued for now than to accidentally glue down the cover.
*The reason I only did the first quarter is because I wanted to insert the ribbon marker and clear elastic later. Therefore, I couldn't glue all the pages just yet. If you just want a hollow book without the ribbon and elastic, go ahead and glue all the pages, EXCEPT for the last 4 or 5, or however many pages you want to leave as the bottom of the "box" when you're done.
3. Place something heavy on top of the book and let the glue dry. I placed a notepad between the book and the cans to even out the weight and to protect the book from any marring.
4. After the glue is dry, use your e-reader to trace the hole you will be cutting out. Make sure that it's centered and straight, then use a straight edge and the exacto knife, and start cutting.
*Tip - it's better to cut it just the smallest smidge too big than it is to shave off a millimeter or so afterwards because it's too small. Trust me on this! You still want a close fit though, to keep your e-reader safe.
The cutting process is a long one, but please take your time. Just gently cut through a couple of pages at a time. If you find yourself pushing too hard on the knife, back off, because one slip.... and it's off to the hospital for stitches; or even worse, you may cut where you don't want to cut and have a crummy looking hollow book when you're done. :)
5. When you're done cutting through the first quarter of the book, it's time to glue together the rest of the pages.* Well, most of them, anyway. Leave out 4 or 5 pages in between, and 4 or 5 pages at the end. This is just a buffer to make sure the glue doesn't seep too much and glue all of them together yet. (In the above picture the book is upside down, so the cut out portion is actually at the front of the book... I don't know why it's upside down, it just is.) Glue the back section of pages together, weighing them down as they dry, just as you did the front section.
*Again, if you're not including the ribbon or elastic, you will omit this step, as your book will already be glued together.
6. After the glue is dry, put a piece of cardboard just before the pages at the back that will be the bottom of the box, so they don't get cut. Continue to hollow out the book.
8. When you're all done hollowing, the edges where you have cut will be rough. Carefully sand them with coarse sand paper to smooth them down.* It won't be perfect, but it will have a much more finished look.
*Hold the pages together as tightly as you can to prevent damaging them as you sand. The pages, which were glued lightly, will probably be coming apart a bit, and the edge you will be sanding hasn't been glued at all. Remember, it doesn't have to look perfect, just sand off the roughness.
9. Now it's time to add the ribbon and the elastic. Lift the first quarter of the book (that you originally glued together) and place the ribbon and elastic as pictured above. Staple them in place by opening the stapler so you can staple right into the pages beneath... Just like you would staple something to a bulletin board. As long as at least one side of the staples catch the ribbon and elastic, it should be fine. Sorry, no picture to show you, I hope my explanation makes sense!
*The elastic, of course, is to help keep your e-reader securely in place, and the ribbon is meant to go under it to help lift it out when you need it.
10. Glue the back cover and back pages to each other and to the hollowed out pages using regular glue (sparingly) not the diluted glue, to help avoid wrinkles in the bottom. Glue all the edges around the outside of the book, and the inside edges of the hollowed out portion, using a thin layer of the glue/water mixture. Apply the glue in several coats, weighing down the book and letting it dry in between, until you feel confident that it will hold solidly.
And there you go!
Alisa


